myTarget Integration Guide
This guide will instruct you step-by-step on how to set myTarget live as an ad network on Unity LevelPlay.
- The required Gradle Build Tool is 3.5.4+
Step 1. Create a myTarget account
Create an account with myTarget, You can do so here
Step 2. Create an application in myTarget
Follow these steps to create your myTarget application:
- In your myTarget account go to Apps ➣ Create an app
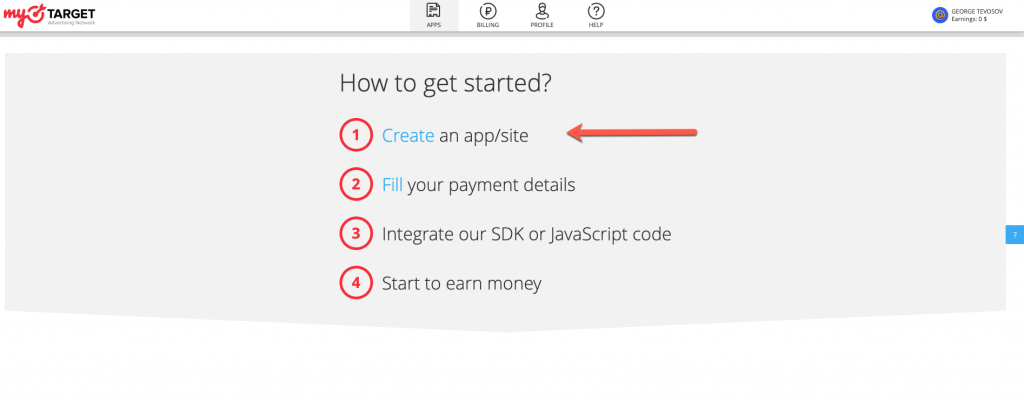
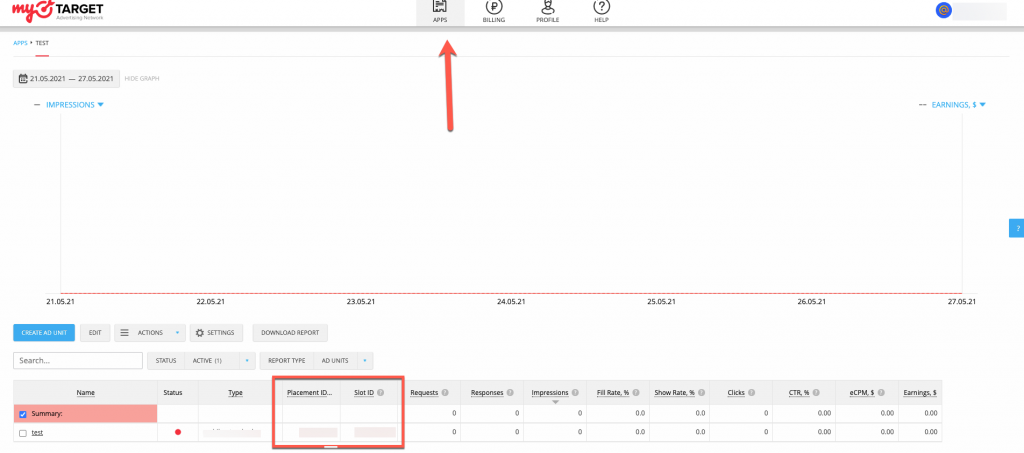
- Once you set a new app, you’ll be able to retrieve your ‘Placement id’ and ‘Slot id’ – In order to set in Unity LevelPlay
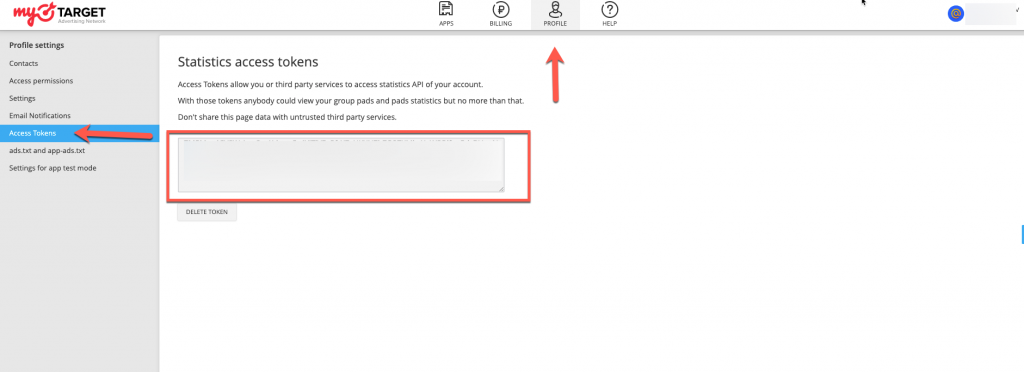
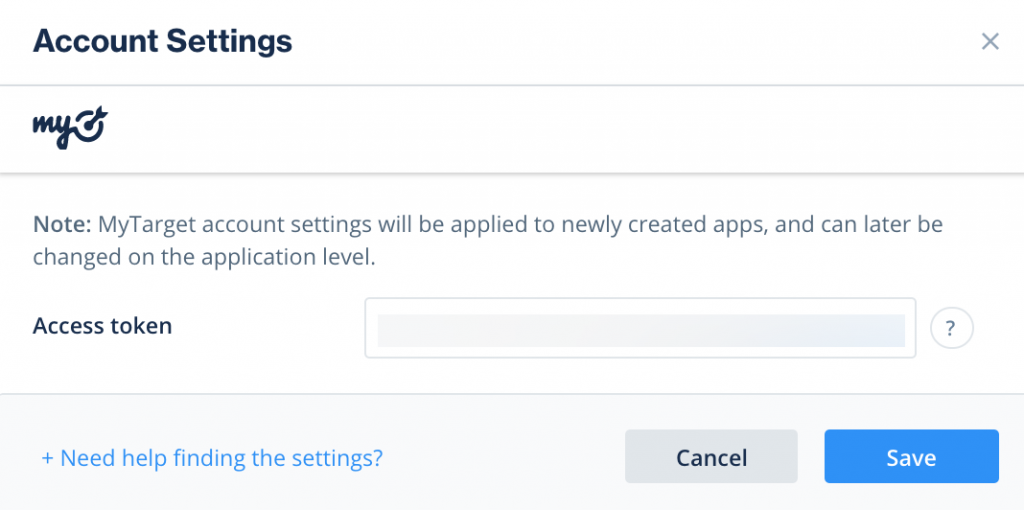
Step 2.Retrieve Your myTarget Access key
- In your myTarget account go to Profile ➣ Access Token
Step 3. Activate myTarget in your mediation setup module
Inside the ironSource platform, access the SDK Networks setup to configure myTarget parameters into your ironSource account.
- Once you have all the required parameters, log in to your ironSource account and go to Monetize ➣ Setup ➣ SDK Networks
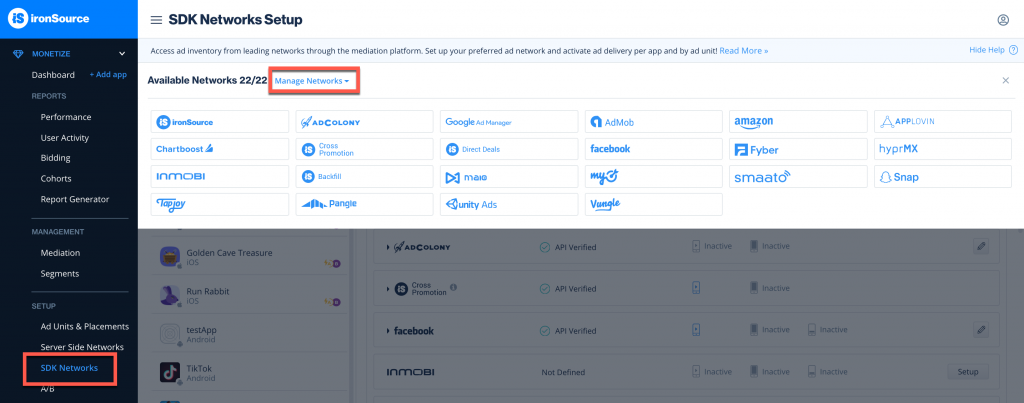
- Select myTarget from the table of Available Networks , add the parameters, and click on the Activate button. Then click Save.
- Select myTarget from the list of ad networks and click Setup.
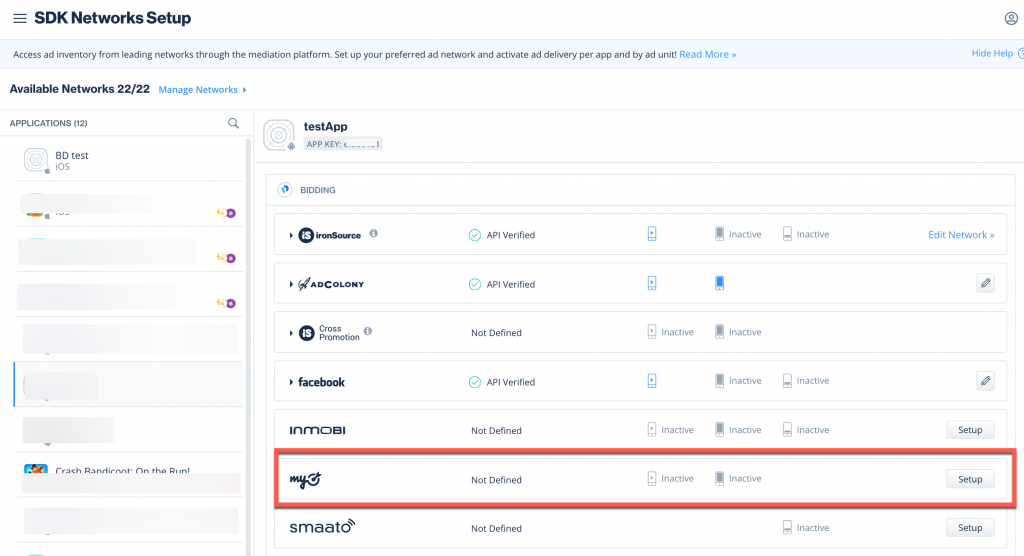
- Enter your myTarget app’s ‘Access token’, then for each adunit the ‘Slot ID’ and ‘Placement ID’. Set the status to Active and click Save.You’ll see myTarget listed as Active for Mediation on your Setup dashboard.

Step 4. Integrate the ironSource Mediation Network Adapters
Once you’ve completed SDK integration, you can download myTarget Adapter, using the Unity Integration Manager. In your Unity Development platform, go to ironSource > Integration Manager If you already have the latest version of the adapters, the action button will be changed to “Updated”, and will be disabled. Android (Manual Resolve) To apply your changes, make sure you use the “Resolve” process. This will download all relevant artifacts, according to your choices. For detailed information see instructions here. For Proguard Users Only Make sure to define MyTarget SKAdNetworkItems to your Info.plist, by using this code:Unity Integration Manager (Recommended)
Android Plugin Manual Integration
Download myTarget adapter and SDKs (AAR) from here.
Import the files into Assets/Plugins/Android/
If you are using ProGuard with the MyTarget adapter, you must add the following code to your ProGuard file:-keep class com.my.target.** {*;}
iOS Manual Integration
Download the adapter and SDK (Frameworks) files from here.
Import adapter and frameworks file into Assets/Plugins/iOSStep 5. Update SKAdNetworkItems for iOS
<key>SKAdNetworkItems</key>
<array>
<dict>
<key>SKAdNetworkIdentifier</key>
<string>n9x2a789qt.skadnetwork</string>
</dict>
</array>