Smaato integration guide
This guide will instruct you step-by-step on how to set Smaato live as an ad network on the ironSource Mediation platform.
Step 1. Create a Smaato account
To access Smaato ad inventory through ironSource‘s mediation platform, you must create an account with Smaato. You can do so here.
Step 2.Retrieve Your Smaato Account ID’s and Report Keys
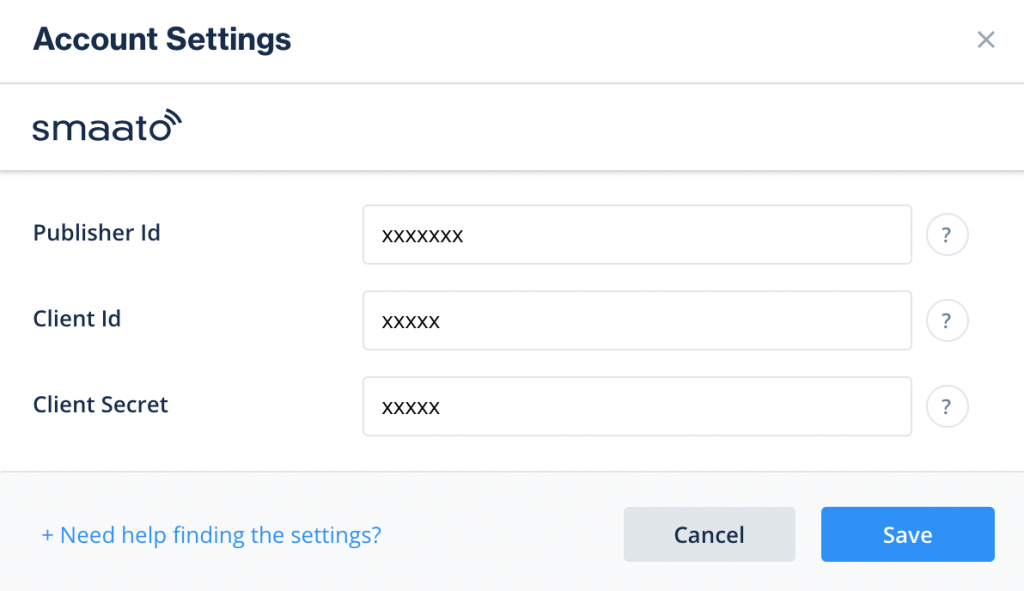
Follow these steps to retrieve your Smaato account key’s which need to be inserted into your ironSource Network Setup Module in order for Smaato to work correctly in connection with ironSource:
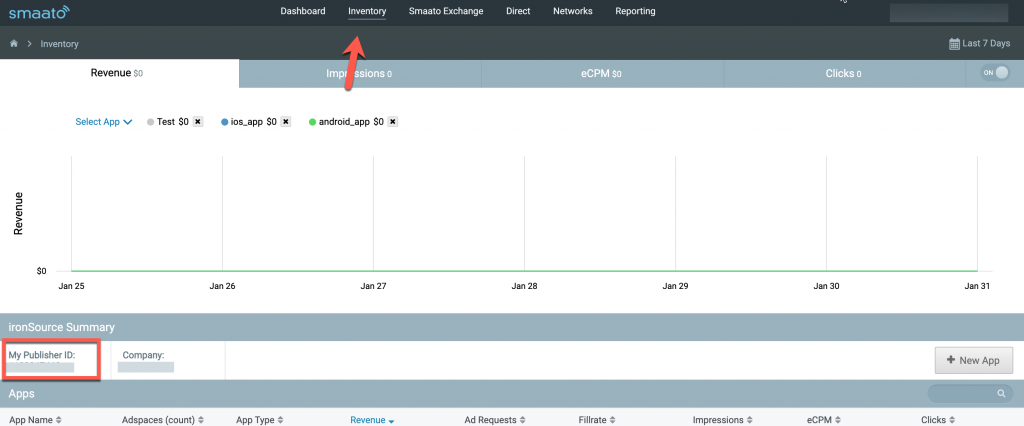
- Publisher ID – In your Smaato account go to Inventory ➣ Publisher id
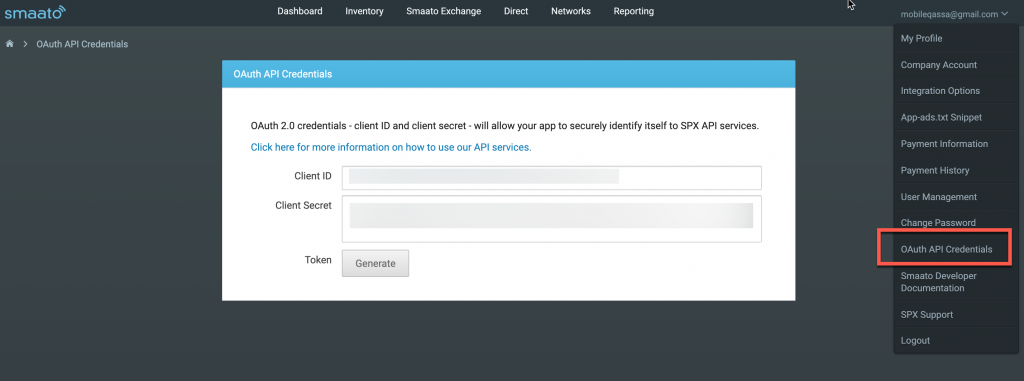
- Client ID and Client Secret – Go to QAuth API Credentials ➣ Client ID and Client Secret
Step 3. Create an application in Smaato Network
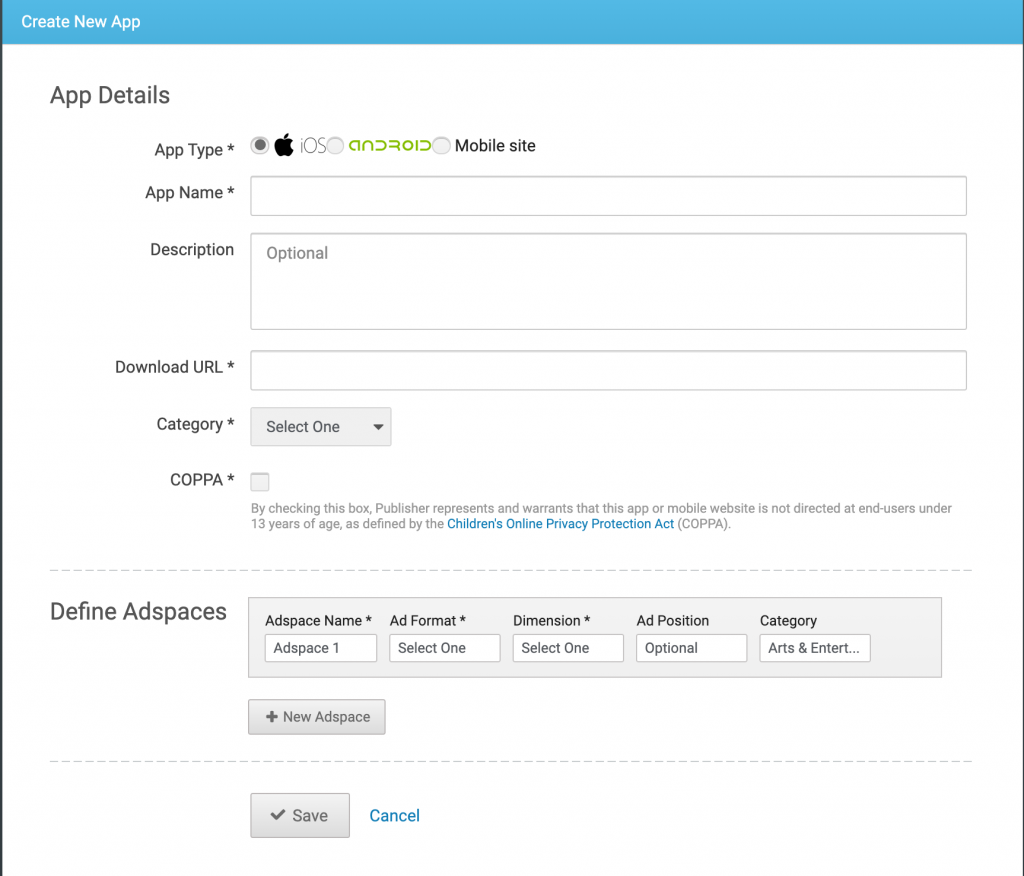
Follow these steps to create your Smaato application:
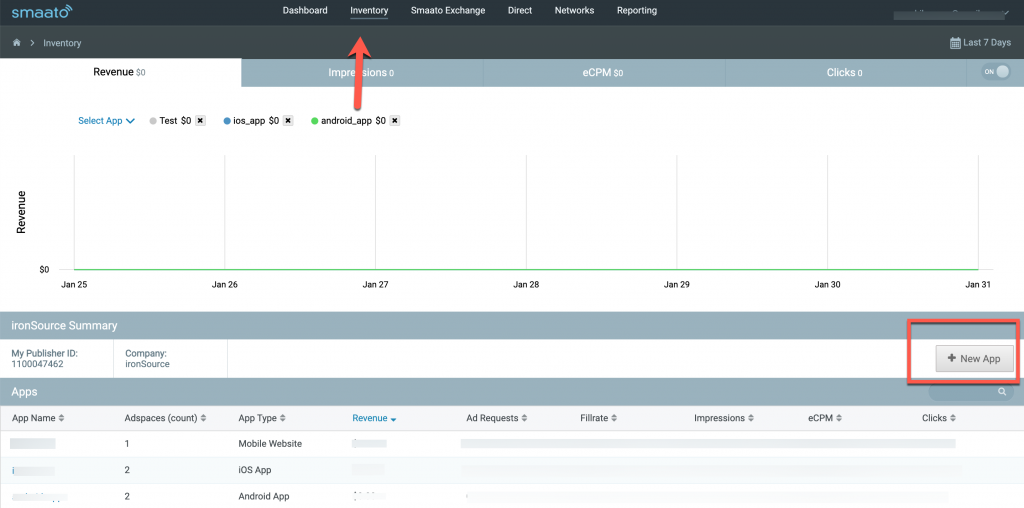
- In your Smaato account go to Inventory ➣ New App
Step 4. Activate Smaato Network
Inside the ironSource platform, access the SDK Networks setup to configure Smaato parameters into your ironSource account.
- Once you have all the required parameters, log in to your ironSource account and go to Monetize ➣ Setup ➣ SDK Networks
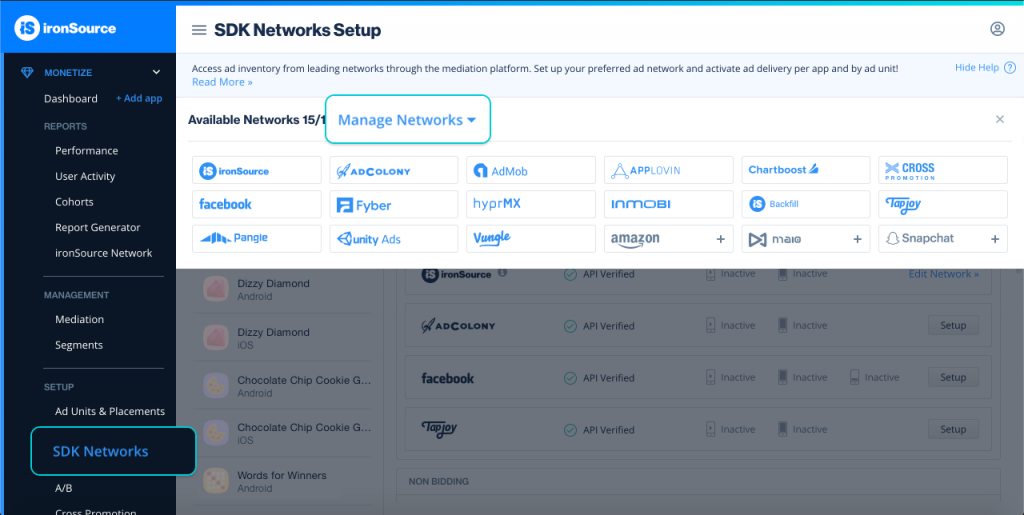
- Select Smaato from the table of Available Networks , add the parameters, and click on the Activate button. Then click Save.
- Select Smaato from the list of ad networks and click Setup.
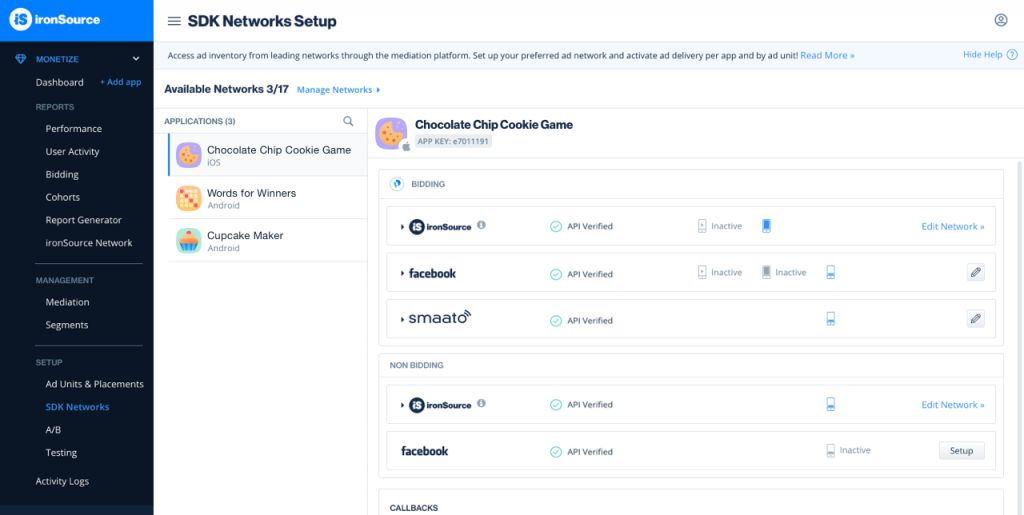
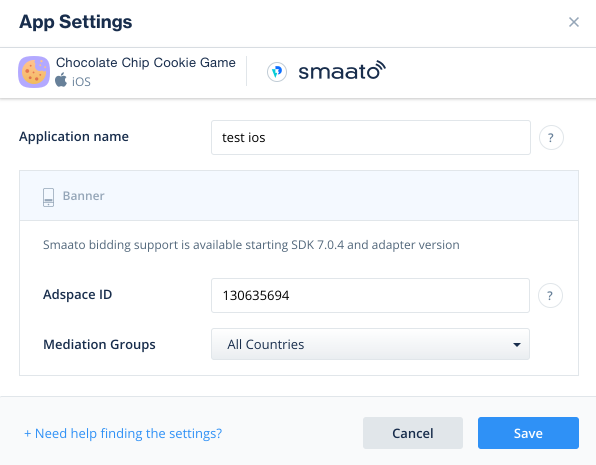
- Enter your app’s Smaato App name and Adspace ID. Set the status to Active and click Save.You’ll see Smaato listed as Active for Mediation on your Setup dashboard.
Step 5. Add the Smaato adapter to your build
ironSource supports both Gradle dependencies and manual download mechanisms.
Gradle:
- Make sure the following Maven URL exist in your build.gradle script of your app module .
repositories maven { url "https://s3.amazonaws.com/
smaato-sdk-releases/" url "https://android-sdk.is.com/" } - Add the adapter’s Maven name to your build.gradle script of your app module.
implementation 'com.ironsource.adapters:smaatoadapter:4.3.10'
implementation 'com.smaato.android.sdk:smaato-sdk-banner:22.6.0'
implementation 'com.smaato.android.sdk:smaato-sdk-in-app-bidding:22.6.0'
Manual download:
- Download the Smaato Adapter:
Add the Smaato Adapter and SDK to your build. You can find the latest Smaato files here. - Add the Smaato Adapter to your Project:
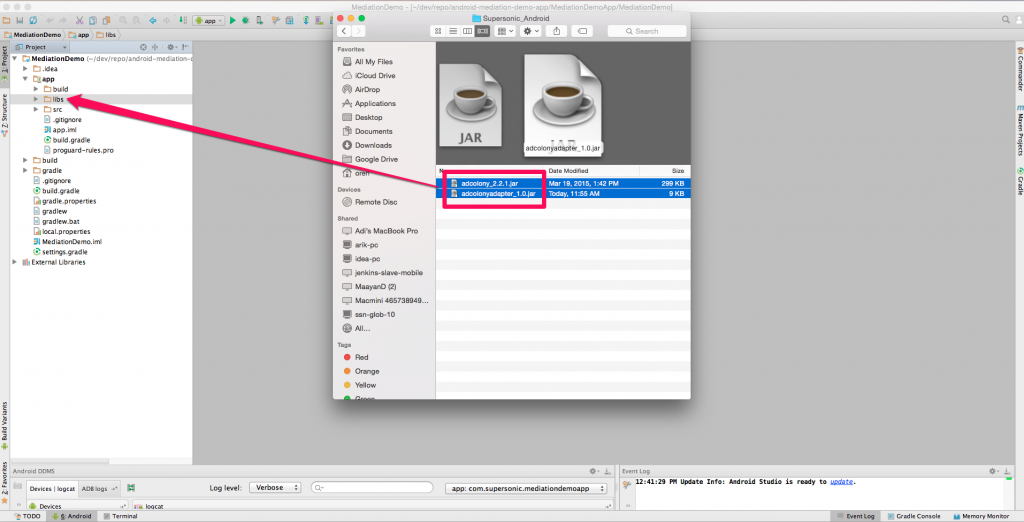
After you download the Adapter; drop the SmaatoAdapter AAR into the libs folder in your Android Project.
- Make sure you add the following to your Gradle build file under the dependencies section:
implementation 'com.ironsource.adapters:smaatoadapter:4.3.10'
implementation 'com.smaato.android.sdk:smaato-sdk-banner:22.6.0'
implementation 'com.smaato.android.sdk:smaato-sdk-in-app-bidding:22.6.0'
- Download the Smaato file from here:
- If using Eclipse: Import the .AAR file as a library project.
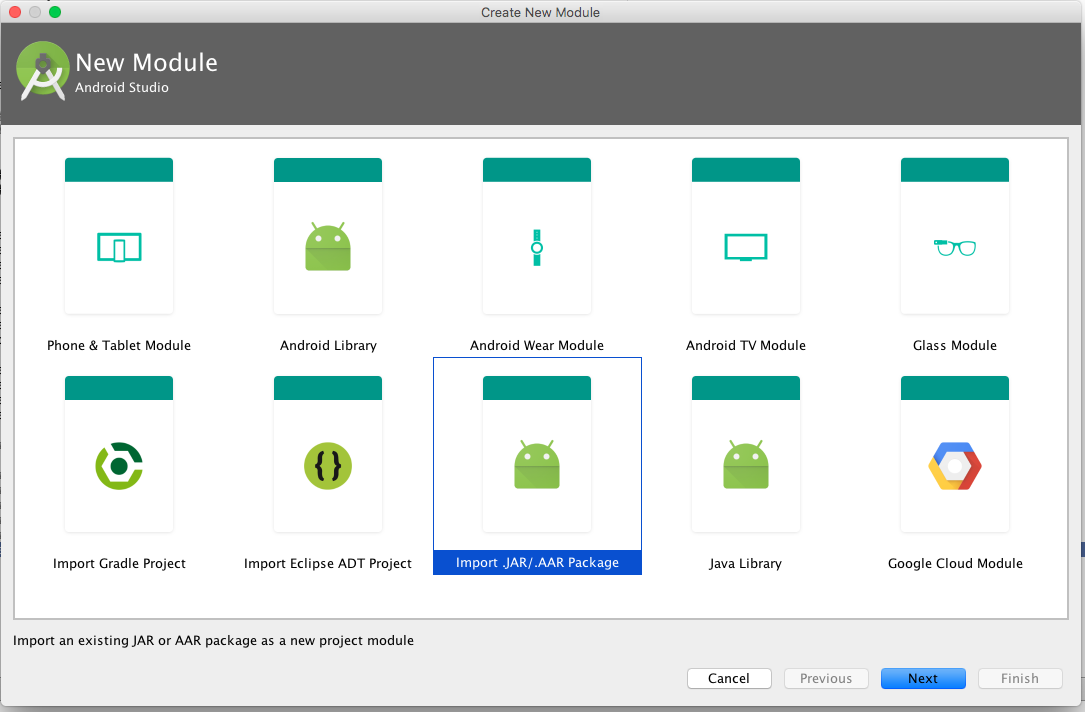
- If using Android Studio, download the Smaato .AAR file and add as a dependency to your own module. Go to File ➣ New ➣ New Module ➣ Import .AAR and navigate to the location where the Smaato .AAR file has been downloaded.
Step 6. Additional configuration
If your application targets Android 9 Pie (API level 28) or higher, follow the integration steps below.
- Configure the networkSecurityConfig attribute in the application tag in AndroidManifest.xml:
android:networkSecurityConfig="@xml/network_security_config" - Create the network_security_config.xml in the XML resource directory with:
<?xml version="1.0" encoding="utf-8"?>
<network-security-config>
   <base-config cleartextTrafficPermitted="true" />
</network-security-config>
You can read more about the Network security configuration here.