Digital Turbine Mediation Integration Guide
This guide instructs you step-by-step on how to set Digital Turbine live as an Ad Network on the Unity LevelPlay Mediation.
- Make sure you have correctly integrated ironSource SDK’s Rewarded Video, Interstitial or Banner into your application.
Step 1. Create an Digital Turbine Account
- Create an account with Digital Turbine. You can do so here.
- Once your account has been verified, you can log in to their partner login here.
Step 2. Create an Application and Ad Spot in Digital Turbine
To gain access to Digital Turbine inventory within ironSource platform, you must first add your app and set up Ad Spots in your Digital Turbine account.
- Add Your App
- Log into your Digital Turbine account, navigate to ‘Inventory’ ➣ ‘Manage Apps & Sites’. select ‘Add App Or Site’.
- Define the settings of your app.
- Create an Ad Spot
Once your application has been added, you can create an Ad Spot. In Digital Turbine system Ad Spots defines the Placement & Ad Unit to which Digital Turbine delivers ads.- Select ‘+ New Ad Sopt’
- Create the Ad Spot settings:
- Ad Spot Name
- Select Ad Units: Make sure to chose a single Ad Unit to use in this Ad Spot
- Setup Ad Unit:
- Interstitial:
- Select between Display, Video or both
- Banner:
- Keep ‘Request Intervals’ Disabled
- Interstitial:
- Save Ad Unit
- Continue twice
- Select ‘+ New Ad Sopt’
Step 3. Activate Digital Turbine in the SDK Networks Setup Module
There are a few parameters from your Digital Turbine account which need to be inserted into your SDK Network Setup Module on the ironSource platform in order for Digital Turbine to work correctly in connection with ironSource SDK:
|
Publisher ID, Consumer Key, Consumer Secret |
This is a unique identifiers for your Digital Turbine account, which allows the ironSource Platform to import performance data from your Digital Turbine account to use in reporting & optimization. |
| App ID | This is a unique identifier of your application in Digital Turbine system. |
| Placement ID | This is the unique spot which Digital Turbine will deliver ads to. |
Once you obtain this information, you must configure Digital Turbine Parameters in your ironSource Account. By adding the above information correctly, you will be able to take full advantage of Digital Turbine ad inventory and reporting data on the ironSource platform.
- Publisher ID, Consumer Key, Consumer Secret
Navigate to the ‘User Profile‘ page and you will locate them on the bottom part of the page under ‘Reporting API Keys’ - App ID, Placement ID
Navigate to ‘Inventory’ ➣ ‘Manage Apps & Sites’ ➣ Select the relevant application from the list ➣ Select ‘Integration Options’ from menu on the right.
Configure Digital Turbine Parameters into ironSource Account
- Once you have all of these parameters, log in to your ironSource account and go to ‘Monetize‘ ➣ ‘Mediation‘ ➣ ‘SDK Networks‘.
- Select Digital Turbine from the list of Available Ad Networks and enter the Digital Turbine ‘Publisher ID‘, ‘Consumer Key‘, ‘Consumer Secret‘. Click ‘Save‘.
- Digital Turbine will then be enabled in the Available Ad Networks table.
- Make sure to define the app on which you’d like to run Unity LevePlay with Digital Turbine. Go to the Digital Turbine row on the Setup list of Ad Networks and click on the ‘Setup‘ button.
- Insert the ‘App ID‘ on the application level, and ‘Placement ID‘ for the relevant Ad Units.
- Click ‘Save’.
- Activate requested Ad Units.
- Verify your integration with the Reporting API; this column will check your integration through the Reporting API and return three possible responses: Verified, Failed and No Response. Double check your integration and the information you entered above; then click ‘Retry‘ until you see ‘Verified’.
Step 4. Add the Digital Turbine Adapter to Your Build
- Download the Digital Turbine ANE:
Add the Digital Turbine Adobe Native Extension to your build. You can find the latest Digital Turbine ANE here.
Important! Make sure you download both Adapter and SDK. - Add the Digital Turbine ANE to your Project:
To add the ANE, simply add it to your project by clicking on project properties ➣ Flex build path ➣ Native Extension Tab. Click on ‘Add ANE’ and choose file you downloaded in the previous step. - Make sure you mark the ANE to be packaged into your application on Flex Build Packaging ➣ Native Extension Tab, select the checkbox of ‘package‘.
- Make sure to add the following extensions, for iOS and Android:
<extensionID>com.ironsource.adobeair.fyber</extensionID> <extensionID>com.ironsource.adobeair.fybersdk</extensionID> - For Android Only
Adding the content of the fyber.zip file onto the src folder of the adobe project
- On the “module settings”, select Android.
- Click on the “+” icon, select the path where you saved your files
- Add the files one by one and make sure they are under the “src” folder
- For Android Only, Update AndroidManifest.xml
<activity android:name="com.fyber.inneractive.sdk.activities.InneractiveInternalBrowserActivity" android:configChanges="keyboardHidden|orientation|screenSize|smallestScreenSize|screenLayout" android:hardwareAccelerated="true" android:screenOrientation="fullUser" /> <activity android:name="com.fyber.inneractive.sdk.activities.InneractiveFullscreenAdActivity" android:configChanges="keyboardHidden|orientation|screenSize|smallestScreenSize|screenLayout" android:hardwareAccelerated="true" android:theme="@android:style/Theme.NoTitleBar.Fullscreen" /> <activity android:name="com.fyber.inneractive.sdk.activities.InneractiveRichMediaVideoPlayerActivityCore" android:configChanges="keyboardHidden|orientation|screenSize|smallestScreenSize|screenLayout" android:hardwareAccelerated="true" android:theme="@android:style/Theme.NoTitleBar.Fullscreen" /> <activity android:name="com.fyber.inneractive.sdk.activities.InternalStoreWebpageActivity" android:configChanges="keyboardHidden|orientation|screenSize|smallestScreenSize|screenLayout" android:excludeFromRecents="true" android:screenOrientation="sensor" android:theme="@android:style/Theme.Translucent.NoTitleBar" /> <activity android:name="com.fyber.inneractive.sdk.activities.FyberReportAdActivity" android:configChanges="keyboardHidden|orientation|screenSize|smallestScreenSize|screenLayout" android:hardwareAccelerated="true" android:screenOrientation="fullUser" /> - For iOS Only
Add the dependencies folder to your project:
-
-
- On the “module settings”, select iOS
- Click on the “+” icon and select the path where you saved your ios dependencies
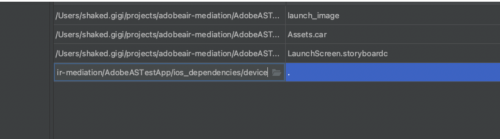
- Select inside the folder “devices” and add a dot “.” to include all files
-
Done!
You are now all set to deliver Digital Turbine Ads within your application!